10/02/2019

Download Movies on iPhone for Free? Learn the Best Way


1. Top 5 Free Websites to Download Movies for iPhone

Below we have detailed some of the best and legal websites that allow you to download movies to your computer, which you can then transfer over to your iPhone and watch on-the-go. Download free movies from these websites first, and follow the next part to move the movie to your iPhone.
Top 1: Crackle
Crackle is an online streaming service created by Sony. From this website, you’re able to browse all of their free content which you don’t have to pay for. Some of the content is available for download, although not all of it is.


Top 2: MoviesFoundOnline

This website has more than the other websites to offer – movies such as The Grudge 2, Chris and Jack, and Now You See it can be watched. Some of the videos from this website are hosted on YouTube, making it possible to download them.


Top 3: PopcornFlix

Next, PopcornFlix – not to be confused with PopCorn Time, another streaming platform – is a great website to watch movies on. While you aren’t able to download movies, they have a wide selection of foreign, animation, and thriller movies.


Also Read:Fix SIM Not Provisioned Android Error with 4 Methods
Also Read:Make Blurry Pictures Clear With These 6 Tools

Top 4: Hulu

Unfortunately, Hulu hasn't yet added a download feature for their content although there are a few different Hulu converters out there. If you find a Hulu video that you want to download, use one of these websites.


Top 5: YouTube

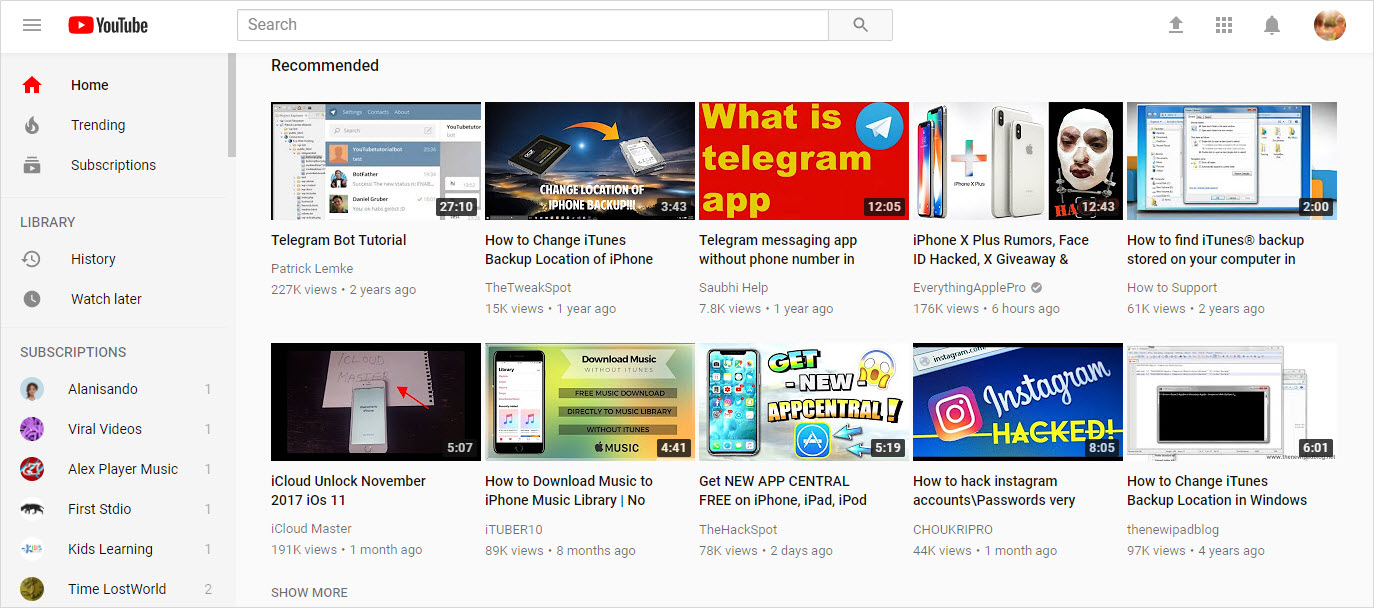
Recently, YouTube Have added the ability to download YouTube videos through their mobile app and if you have purchased a movie from YouTube, you can use the app to download it on your iPhone. While YouTube doesn't allow you to download movies on a computer, you can use a YouTube converter to do so.

Also Read:mp3 music downloader app iphone

Also Read:airplay without apple tv


3/01/2019

How to Find Lost AirPods By Playing a Sound 2019

How to Find Lost AirPods By Playing a Sound 2019


AirPods are quite easy to lose. Way too easy to lose. If you’re the forgetful kind, you can quite easily forget the small AirPods case. And a single AirPod is easy to lose in the gym or when changing clothes. Here’s how you can quickly and easily find lost AirPods (either a single AirPod or the case).
How to Find Lost AirPods By Playing a Sound

Thankfully, Apple thought about this. Hopefully, you won’t need to drop $69 to replace an AirPod. And there’s a Find my AirPods feature, just like Find my iPhone. In fact, it’s located inside the Find my iPhone app. And if you’ve enabled the Find my iPhone feature, the Find my AirPods feature is enabled automatically.

Doesn’t matter if you’ve lost a single AirPod or the AirPods case, you can easily find lost AirPods with the Find my iPhone app.

Step 1: Open the Find my iPhone app on your iPhone. If you haven’t’ started using it yet, log in with your iCloud account.


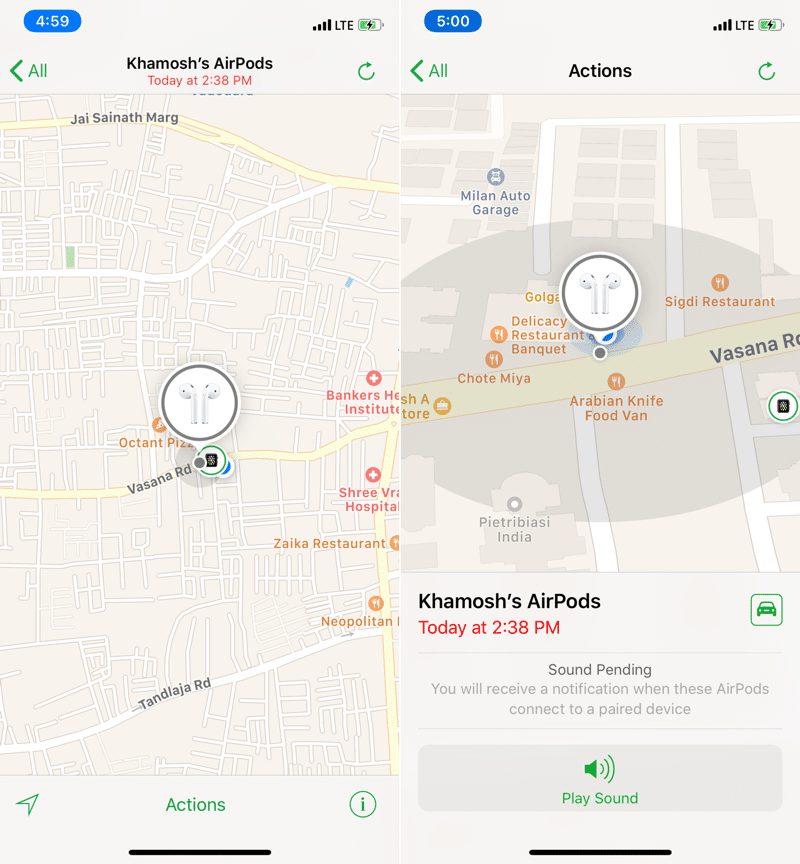
Step 2: Tap on your AirPods from the list and it will show up in the map, with the location (or the last location it was connected to your iPhone).

Step 3: If you see a green dot next to AirPods, this means your AirPods are nearby and are still online. Tap on Play Sound button to gradually increasing the sound on the AirPods. Now all you have to do is follow the sound to locate the AirPod or (AirPods).

Step 4: If they’re far away, just still online, you can tap on the Car button to get directions to the location of the AirPods.
How to Find AirPods Case If They Are Offline

If you’ve left the AirPods case somewhere and they’ve run out of battery, your AirPods will be offline. If you’ve never used Find my iPhone, the AirPods will show up as offline the first time you try to find them after losing them.

But not all is lost. You can still navigate to the last location they were found online.

Step 1: Open the Find my iPhone app and tap on the AirPods from the list.


Step 2: If they’re showing a grey dot, this means they’re offline. But you’ll still be able to see the last location on the map. You can tap on the Car button to navigate to their last known location. When AirPods are offline, you can’t play a sound on them.

Step 3: Once you reach the location of the AirPods, you’ll have to find them the old fashioned way – look for them.

If you don’t have your iPhone handy, you can look for AirPods using iCloud.com as well. Log in with your account and go to the Devices section to find your AirPods.
AirPods Tips and Tricks

There’s a lot you can do with this seemingly simple wireless earphones. We’ve outlined ways to customize not just the behavior but the AirPods device as well in our AirPods tips and tricks article.

Do you love your AirPods? Have you lost and recover them yet? Share with us in the comments below.Also Read:5 Best Funny Face Swap Apps For iPhone in 2019
Also Read:How to Share Private Home Videos with Family and Friends?

2/25/2019

Official iPhone/iPad Activation Lock Removal Service (iOS 12 Supported)

Official iPhone/iPad Activation Lock Removal Service (iOS 12 Supported)
1. How to Use iPhone/iPad Activation Lock Removal Service Online


If you don’t want to bypass the activation lock using the above method, then you might be able to see some results by employing a special service. You can go online and get your iCloud activation lock removed like this:


Step 1. Go to officialiphoneunlock.co.uk and you will see a page with different services listed.


Step 2. Click where it says iCloud unlock.


Step 3. Now you just choose what model of phone you have, input your IMEI or serial number, and then pay the small fee to get your phone unlocked. In a few days, your iCloud account will be unlocked.
Limits of Official iPhoneUnlocks:


It promises to remova activation lock in 3 business days. But some users claimed online that the whole process remained a month.


It promises to issue refund if the service is not working. But they refused to issue refund but gave you voucher as compensation.


You may need to pay more than once.
2. How to Perform iPhone/iPad Activation Lock Removal with Bypass Tool


You can also use a dedicated iPhone activation lock remover if you don’t want to pay for the service. There are a few different applications out there that can do this. They basically work like this, though:


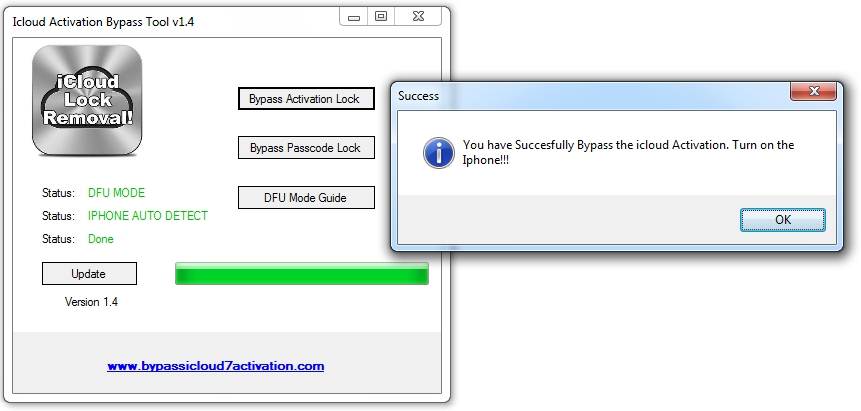
Step 1. Download the lock remover on your computer and install it. (iCloud activation bypass tool version 1.4 is a good one to try.)


Step 2. Plug your iPhone into your computer and open up the program.


Step 3. The software will scan for your IMEI number automatically.


Step 4. In the case of iCloud activation bypass tool version 1.4, you just click Bypass Activation Lock and then the tool will connect to Apple’s servers and attempt to delete the device’s association with the iCloud account.


Step 5. Just wait until it is done and don’t unplug your phone. Reboot your phone once it is done.


After the process is completed, you will find that the iCloud lock has been permanently removed and there is no longer requiring iCloud activation to use the device.


Also Read:Voice Changing Apps & Software for Skype Sponsor ads:Fix SD Card Error on GoPro Hero


Limits of icloud Activation Bypass Tool v1.4:


There is no way to download this tool.


It's working for just old iOS versions.
3. How to Bypass iPhone/iPad Activation Lock Through DNS Method


You can also bypass the activation lock by pointing your device to a different DNS server. This will allow you to temporarily bypass the iCloud activation lock. Here’s how you do it:


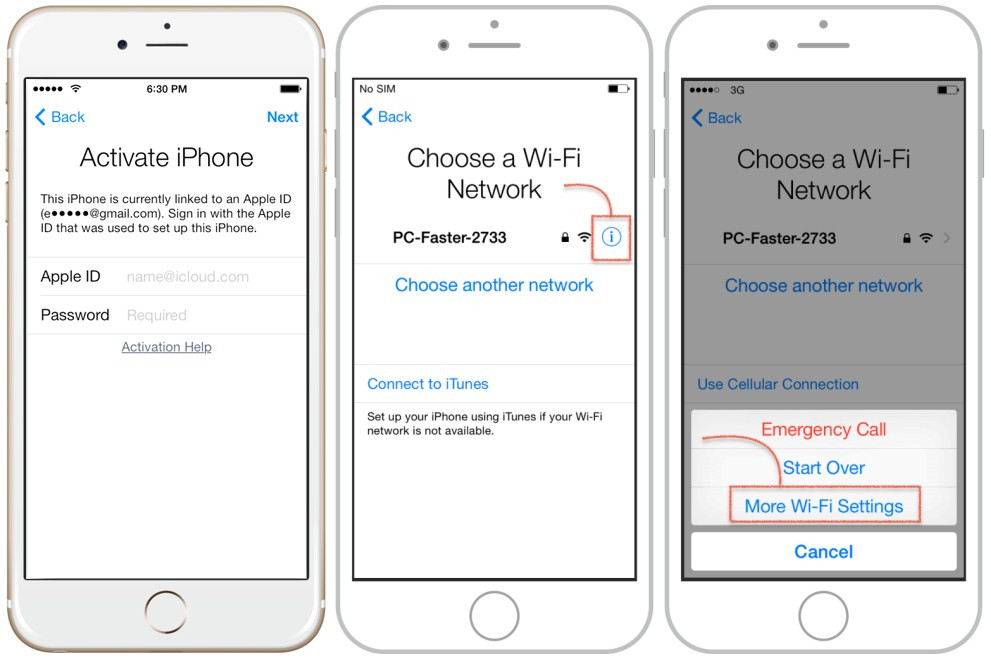
Step 1. When you’re on the activation screen, press on the Home button.


Step 2. Go into the WIFI settings, then tap the little “i” with a circle around it.


Step 3. Input the address of a new DNS server, one that will allow you to bypass iCloud. (You can look online for a good and safe DNS to connect to.)Also Read:Set a Voice Recording as a Ringtone on iPhone Xs/X/8/7/6s
Also Read:Blogging Apps for iPhone and iPad to Start Your Blog


Step 4. Now tap Back > Done > Activation help.


Step 5. You should see a message that says you have connected to the server. Tap the Menu icon at the top of the screen.


Now you should have access to some of the apps on the phone.


These are all viable methods for getting past the iCloud activation lock. Each one works well for a particular situation, so make sure that you use them accordingly.
Limits of DNS Methods:


This way is not 100% working especially for new iOS versions.
Some ways introduced in this post may be out of date and only works for old iOS versions. But the recommended way for iCloud account removal via iMyFone LockWiper is compatible with new iOS version.

Also Read:5 Best Funny Face Swap Apps For iPhone in 2019 Also Read:How to Share Private Home Videos with Family and Friends?

Text Message Notifications Not Working in iOS 12? Here Is the Fix 2019

Text Message Notifications Not Working in iOS 12? Here Is the Fix 2019
1. Turn off Do Not Disturb to Fix No Text Notification

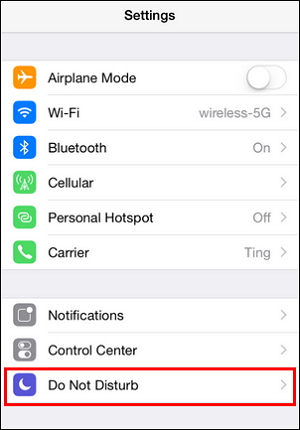
Do Not Disturb is a feature in iPhone that will restrict the device from getting the notifications on locked screen. If this feature is enabled in your device, it can result in the problem. So, the first thing to do when text message notifications is not working in iOS 11 is to disable the "Do Not Disturb" feature. For this, Go to "Settings" > "Do Not Disturb" and disable it. Or, you can go to control center by swiping up the screen from bottom and tap on crescent moon shaped icon to disable "Do Not Disturb".


2. Turn off Bluetooth to Fix Text Notification Not Working

Check if Bluetooth is enabled or not. If yes, disable it to see if you can get text notification normally. Head to "Settings" > "Bluetooth" and toggle it off.


3. Check Notifications Settings on iPhone Running iOS 12/11

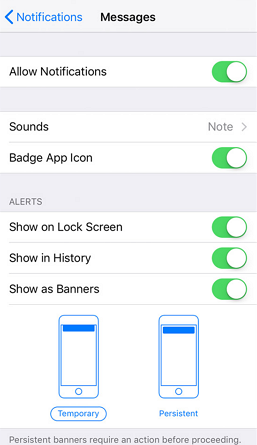
Sometimes, we forget even basic things in our busy schedule. If iOS 12 text notifications not working, perhaps there is no sound set for the notifications. To set a sound, head to "Settings" > "Notifications" > "Messages" > "Sound" and select the preferred notification sound.

Also make sure to check that you have enabled one of the notification types. For this, firstly, check if "Allow Notifications" is toggled on. If not, do it now. Secondly, look for "Alert" options and ensure that you have turned on the 3 options.


4. Turn on Recent Notifications to Get Text Notifications

When you enable "Recent Notifications", your device will receive the alerts and notifications even when it is locked. To do this, open "Settings" and tap on "Touch ID & Passcode". Type your passcode and look for "ALLOW ACCESS WHEN LOCKED" option by scrolling down. Turn on "Recent Notifications" and hopefully your problem about messages no notification will be gone.Also Read:Windows Media Player Won’t Play AVI Troubleshooting
Also Read:9 Best Equalizer Apps for iPhone & iPad (iOS 12): Get Ultimate Music Experience


5. Fix Message Notifications Not Working without Data Loss

After trying the above solutions, if still message notification is not working on iPhone running iOS 12/11/10/9/8, perhaps there is a software issue. This can be fixed with the most trustworthy tool which is iMyFone iOS System Recovery. This tool is totally compatible with iOS 12 and performs professionally without any glitch. It helps in fixing various iOS issues without any loss of data. Moreover, iOS System Recovery tool by iMyFone has been successful in achieving praise from many popular media sites.Also Read:Remove the U2 Album from iPhone in 2019
Also Read:5 Best Video Joiner Free for MP4 2018

Fixes to Clear History and Website Data Not Working


1. Apple Fan Provide A Trick to Fix "iOS 12 Not Deleting Website Data"

You can also use a simple trick to fix this problem. Sometimes it works and sometimes it doesn’t depending on why the problem happened in the first place. If Safari is deleting the history of some websites and not others, try this:

Step 1. Go into the settings for Safari and set it to allow cookies by Settings > Safari > Block Cookies.

Step 2. Make note of the websites whose data you can’t erase.

Step 3. Go to the these websites on Safari one at a time and, while leaving them open, go to Settings > Safari > Advanced > Website Data.

Step 4. Swipe the website that you opened and delete. Then tap the back button two times.

Step 5. Tap the Home button twice.

Step 6. Close Safari.

Step 7. Close Settings.

Step 8. Do these steps all over again for each website whose data you’re having trouble erasing.
2. How to Fix "Clear History and Websites Data Grayed Out"

As mentioned, the problem could also be parental controls. If the option to clear history in your Sarafi settings is grayed out, then go to Settings > General > Restrictions, then to Allowed Content, then Websites, and turn any parental controls or adult filters off.


Don't Miss:

How to Clear Safari History on iPhone >>

How to Completely Clear Safari Cache on iOS 12 >>


4. Useful Tips If You Can't Clear Safari History or Website Data

If you’re still having trouble, try one of these useful tips:


Turn off Safari in iCloud through Settings > iCloud > Safari.


Block cookies so that the data isn’t recorded in the first place. You can go to Settings > SAfari > Block Cookies.


Hard reset your device and try deleting the history, cache, etc again.


Reset All Settings and see if that helps. Go to Settings > General > Reset > Reset All Settings to do this.


Permanently erase your website data. You can also erase your data with a third-party application that can permanently erase your history and other private information. This is important because it can keep snoopers from being able to see what you’ve been browsing, and it might even protect you from identity thieves. iMyFone Umate Pro is one of the best data erasers available for this.Also Read:Download Lynda Videos for Free


Also Read:Jihosoft HD Video Converter


Also Read:10 Best Party Planner Apps for your iPhone and iPad in 2019

What's Xilisoft iPhone Transfer?


What's Xilisoft iPhone Transfer?

Xilisoft iPhone Transfer is one of the many iOS transferring tools available today. It can help you get around a lot of iTunes’ restrictions. For example, using Xilisoft iPhone Transfer, you can transfer music and other media that you didn’t necessarily purchase from the iTunes store.
Some of its main features include:

Also Read:iPhone/iPad Keeps Restarting? Here’s the Fix!

Also Read:Add Background Music to Video Online for Free


You can manage your music easily from your computer, without iTunes.


You can back up your music and store it anywhere you want.


You can transfer music from your iPhone, iPad, or iPod to your computer or iTunes.


You can transfer music from iTunes or your computer to any iOS device.


You can share data with several iOS devices at once.


Xilisoft iPhone Transfer Software Review
Test & Review

Xilisoft iPhone Transfer is a decent third-party device manager for your iOS device, especially if you want to bypass the restrictions that come with iTunes. The interface is fairly simple and it loads up very easily. From the main screen, you can simply click around and do things like sync the library on your phone with iTunes, manage the media that is on your device, back up your messages and contacts to your computer, and transfer music back and forth, among many other things.

It is a very easy to use tool and it loads up fairly quickly. Transfer times are reasonable as well. Overall, it’s not a bad tool to use if you need to transfer your iPhone data between devices with different Apple IDs, etc. It’s also good to have if you want more control over your backups.

Pros


You can add songs to your library, etc, without using iTunes. In fact, this program takes over most of the functions of iTunes, so you may not have to use iTunes again, except maybe for updates and phone back ups.


You can transfer most kinds of media freely and without restrictions.


You can back up data to your computer, and potentially external devices, too.


It’s fairly simple to figure out, and most users should get used to the interface within a few minutes.

Cons


It’s not free. It does come with a free trial offer, though.


It cannot support to view or transfer HEIC photos on iOS 11.


It can’t restore crashed iTunes library.Also Read:Top 6 Best Alternative Sites to YTS Torrent Movie Website 2019

Also Read:How to Factory Reset Your iPad without Passcode or iTunes

Delete music from iTunes from PC/Mac 2019


Method 2: Delete music from iTunes from PC/Mac

One can easily delete music files in the iTunes library directly from a PC. To remove music from iTunes on a Mac or PC follow the following steps:

Step 1 : Open iTunes on your pc or mac.

Step 2 : Go to the iTunes library and find the song, songs or albums you want to delete and then select them.

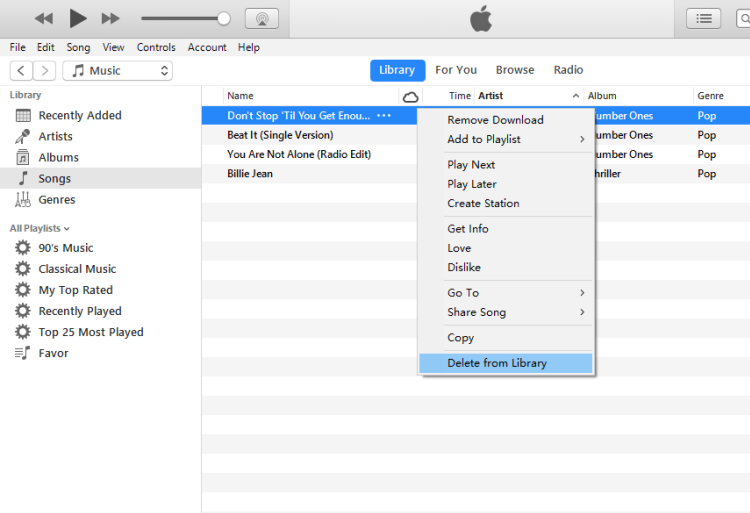
Step 3 : Click on "..." icon and then tap Delete. You can also directly press the delete key on your keyboard to remove the selected items.

Step 4 : After hitting or choosing delete, iTunes the pops up a window with several options that let you decide what to do with the file. These options include Remove Download, Delete Song, Keep File, Move to Trash and Cancel.

Step 5: Choose the option to use, and then empty the recycle bin to remove the file from your computer completely.


If you had previously synced your iDevice to iTunes then to remove the deleted songs connect your iPod or iPad to your PC/Mac and sync the music again with iTunes. Once the sync completes all the files deleted from iTunes will be automatically erased from your iDevice.


Method 3: Delete music from iTunes from iDevice

On your iDevice, you can use the music app to remove any of the songs you do not like anymore.


Step 1 : Launch the music app on your iDevice.


Step 2 : Then find the music file you want to get rid. It can either be a song, an artist or even an album.


Step 3 : Tap the "..." next to the media file you want to erase which will then open a new menu.


Step 4 : From the menu choose Delete.


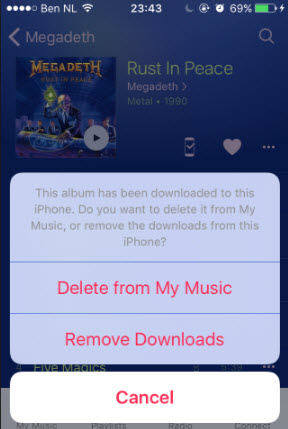
Step 5 : If you are using iCloud Music Library or not, you might see different options. You can see either Remove Downloads or Delete from My Music.


Step 6 : Choose the delete option you want to use, and the files will be deleted from your library.


If you choose Delete from My Music, the file will be deleted both from your device and music library. On the other hand, if you decide Remove Downloads this eliminates the data only from your device and leaves it on your music library.Sponsor ads:

Gihosoft Free iPhone Data Recovery:https://www.gihosoft.com/iphone-data-recovery-free.html

Gihosoft iPhone Data Recovery Free

Free iPhone Data Recovery Software for Windows/Mac

Recover up to 12+ types of files, including contacts, SMS, photos, WhatsApp, Viber, notes, etc.

Restore lost data from iOS devices directly or from iTunes and iCloud backup

Recover iPhone data lost due to iOS upgrade/jailbreak, accidental deletion, device lost or broken

Support all the latest iPhone, iPad and iPod Touch

Both Free and Pro version.

If you lost data after you updated to a new iPhone, you can always use Gihosoft iPhone Data Recovery to get the data back from the old iPhone or backup.You may also like: iphonerecovery.com

If you use android phones, please choose Gihosoft Android Data Recovery.

With Gihosoft Android Data Recovery, no longer afraid of data loss!

Must read:Youtube video downloader for pc

Gihosoft RePicvid Free Photo Recovery Software provides a free photo recovery software for windows to help users recover the deleted or lost photo for free.

Jihosoft Android Data Recovery: the best Android Data Recovery software for Windows and Mac to recover deleted contacts, messages, photos, videos, WhatsApp and etc from Android devices.Tips:How to transfer messages from iPhone to iPhone

jihosoft Free iPhone Data RecoveryAlso Read:Top 6 Best Alternative Sites to YTS Torrent Movie Website 2019
Also Read:How to Factory Reset Your iPad without Passcode or iTunes

12/22/2018

5 Best Panoroma Apps for Android 2019


A panorama is any wide-angle view or representation of a physical space, drawing or photography. The motion picture term panning is derived from the panorama. The panoramic technique is a technique of photography that captures images with wide format photography. It covers a wide coverage of the field. You can capture a large view in just one picture, you don’t have to click separate pictures. It’s fun, artistic and great to look at. But not all of us know how to use it, or necessarily have that function on our mobile devices. So during those times what can help us are mobile applications. So here we provide you the 5 Best Panorama Apps for Android. These apps will help you take beautiful and artistic pictures and will capture your memories in high quality.
Here are the 5 Best Panorama Apps for Android:


Panorama 360


Cardboard Camera


DMD Panorama


Photaf Panorama


HD Camera
1. Panorama 360

P360 is the best app that you can download for Panorama photography. It is called the Instagram of Panoramas. With this app, you can take panoramas seamlessly in a single tap. Just tap on the camera button on your phone slowly then move your phone from to right. Once you are done it will stitch the frames into one awesome panorama.


Main Features:


Non-compass capture.


Automatic geotagging.


Easy and Direct upload to Facebook, Twitter, and Tumblr.


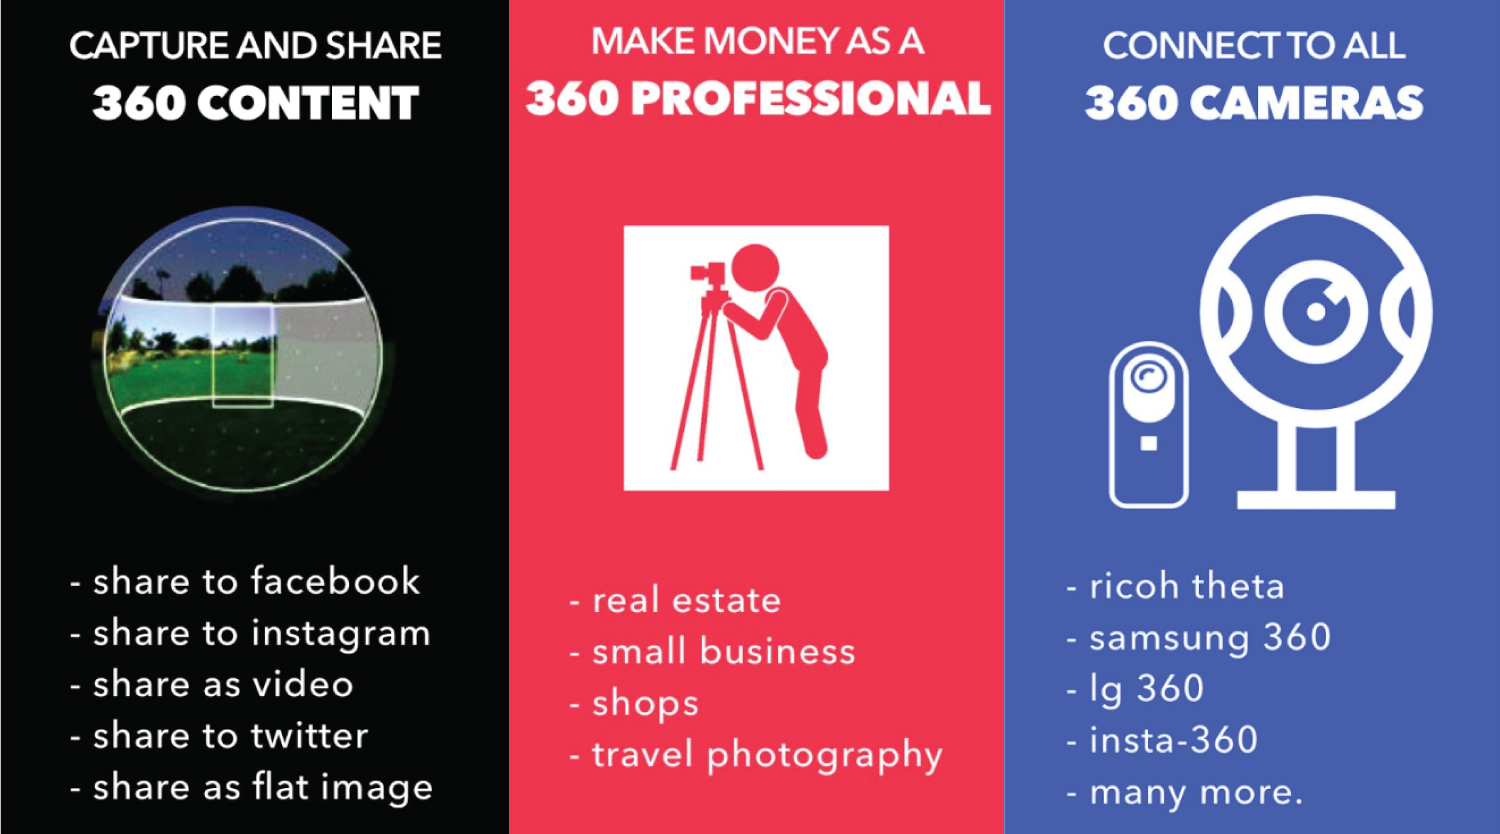
Let Panoramas be shared & viewed via 3D viewer or as flat image.

DOWNLOAD THIS APP
2. Cardboard Camera

From family, vacations to get together to trips you want to capture for yourself. This app makes sure your memories are captured in the best way possible there is. It lets you experience scenery and sounds in every direction and in 3D too. VR like experience you never want to forget.


Main Features:


VR experience.


Panorama setting.


HD quality.

DOWNLOAD THIS APP
3. DMD Panorama

If you are wondering why you need this app then the answer is simple, it provides you front camera panoramic selfies. Something you or anyone else ever had even thought of. It allows even your friends and followers to see the same quality pictures even without having the app.


Main Features:


Get embedded codes.


Follow other panorama lovers.


Edit.


Advanced camera controls.

DOWNLOAD THIS APP
4. Photaf Panorama

It is surely one of the best apps for creating panoramas. You can create beautiful, seamless 360 pictures easily. It’s easy to use with nothing hi-tech that you might not understand. It is a beginner and user-friendly. When you are done taking the picture you can see your result and I am sure it would be epic.


Main Features:


Easily move your photos to SD card.


Pinch to zoom in.


Automatic image stitching.


360 panorama creation.

DOWNLOAD THIS APP
5. HD Camera

Use this app to create high-resolution HD photos with excellent effects, photos, and videos settings. You can take professional quality images with this app. It is fully filled with features that you might need or want to try out. It is prepared with attention to user satisfaction. Use this app for a panorama experience like never before.


Main Features:


HD quality capture.


Face detection.


Video recording.


Photo effects.

DOWNLOAD THIS APP
Related Posts:

Sponsor ads:

Gihosoft Free iPhone Data Recovery:https://www.gihosoft.com/iphone-data-recovery-free.html

Gihosoft iPhone Data Recovery Free

Free iPhone Data Recovery Software for Windows/Mac

Recover up to 12+ types of files, including contacts, SMS, photos, WhatsApp, Viber, notes, etc.

Restore lost data from iOS devices directly or from iTunes and iCloud backup

Recover iPhone data lost due to iOS upgrade/jailbreak, accidental deletion, device lost or broken

Support all the latest iPhone, iPad and iPod Touch

Both Free and Pro version.

If you lost data after you updated to a new iPhone, you can always use Gihosoft iPhone Data Recovery to get the data back from the old iPhone or backup.You may also like: iphonerecovery.com

If you use android phones, please choose Gihosoft Android Data Recovery.

With Gihosoft Android Data Recovery, no longer afraid of data loss!

Must read:Youtube video downloader for pc

Gihosoft RePicvid Free Photo Recovery Software provides a free photo recovery software for windows to help users recover the deleted or lost photo for free.

Jihosoft Android Data Recovery: the best Android Data Recovery software for Windows and Mac to recover deleted contacts, messages, photos, videos, WhatsApp and etc from Android devices.

jihosoft Free iPhone Data Recovery
Worth reading:Best youtube downloader online download youtube 1080p

12/19/2018

Fix iPad Won’t Update to iOS 12/11


Fix iPad Won’t Update to iOS 12/11

Part 1: Why Won't My iPad Update

Updating the iDevice is really easy and simple but sometimes due to the unexpected minor or major problems we cannot update the iOS smoothly. Some of the possible reasons why iPad won’t update to iOS are given below:
1. Compatibility

Your iPad model may not be in the iOS 12 supported device list. Check this and know the compatible devices.
2. Free space

There may not be enough storage space in the device to update: so check whether your device has enough available space to store the update files (generally requires 750-800 MB) or not. In order to check space is available in the device.


First go to Settings on your device > Tap General > Scroll down and choose iPad Storage. At the top of the screen, you’ll see how much storage is available on your device.
3. Network

The Wi-Fi connection may not be stable on your device. To update iOS requires a strong and steady network.
4. Beta installed

Device may be still on iOS 12 beta version (delete iOS beta version). If your device is working on beta version then download error may occur.
5. The server

Apple’s server may be down for some reason. Click here to check system status.
6. Battery

The device may have low battery due to which iPad update stuck in middle or not proceeding.
Part 2: What to Do if iPad Won't Update iOS

If you are one among the people who fail to update iPad to iOS 12, there is no need to worry. Some of the proven solutions mentioned below will help you to solve the issue.


1. Make Sure Your iPad is Connected to Power


2. Check Wi-Fi Connection


3. Delete the iOS Update and Download Again


4. If iPad Software Update Failed, Fix with 3-rd Party Tool


5. Use iTunes to Update iPad
1. Make Sure Your iPad is Connected to Power

Ensure that your device is at least 50% charged before update. Most of the time it has found that the update process is stuck in middle due to device power off which happened because of low battery. So, it is always a good idea to have a good amount of juice on your device.
2. Check Wi-Fi Connection

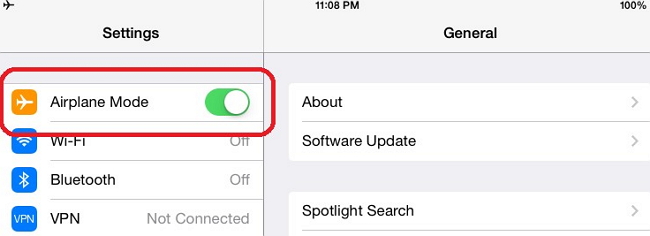
Make sure that you have a strong Wi-Fi connection on your device while updating your iPad to new iOS version. Many of the time the new iOS couldn’t be downloaded due to problem in Internet. So it is good idea to reconnect Wi-Fi on your device. If this doesn't work try to restart your router. Another trick that you can use is: turn-on Airplane mode and then turn it off later.


3. Delete the iOS Update and Download Again

It is better to delete the iOS update if you are facing the error problem. Once you have completely deleted the iOS update, you can again download it and see whether this time you have completed updating your device or not.

Follow the steps to delete the iOS update and download again:


First go to Settings > Tap on General > [Device name] Storage.


Next search iOS update from the list of the apps.


Then tap on iOS updates and tap on Delete Update.Must read:Youtube video downloader for pc


Again go to Settings >> Tap on General >> Tap on Software Update >> Download latest update.


Sponsor ads:

Gihosoft Free iPhone Data Recovery:https://www.gihosoft.com/iphone-data-recovery-free.html

Gihosoft iPhone Data Recovery Free

Free iPhone Data Recovery Software for Windows/Mac

Recover up to 12+ types of files, including contacts, SMS, photos, WhatsApp, Viber, notes, etc.

Restore lost data from iOS devices directly or from iTunes and iCloud backup

Recover iPhone data lost due to iOS upgrade/jailbreak, accidental deletion, device lost or broken

Support all the latest iPhone, iPad and iPod Touch

Both Free and Pro version.

If you lost data after you updated to a new iPhone, you can always use Gihosoft iPhone Data Recovery to get the data back from the old iPhone or backup.You may also like: iphonerecovery.com

If you use android phones, please choose Gihosoft Android Data Recovery.

With Gihosoft Android Data Recovery, no longer afraid of data loss!

Worth reading:youtube video downloader

Gihosoft RePicvid Free Photo Recovery Software provides a free photo recovery software for windows to help users recover the deleted or lost photo for free.

Jihosoft Android Data Recovery: the best Android Data Recovery software for Windows and Mac to recover deleted contacts, messages, photos, videos, WhatsApp and etc from Android devices.

jihosoft Free iPhone Data Recovery


Worth reading:Best youtube downloader online download youtube 1080p

12/14/2018

How To Check Paytm Wallet Balance


How To Check Paytm Wallet Balance:


Install and open the Paytm application.


Once the app is opened, tap on “Passbook”.


Next, enter your lock screen password (if any) for authorization. And then that’s it your Paytm Wallet Balance will be right on your device’s screen.

Now, on the passbook page, you can see your Paytm wallet balance as well as the previous transactions that you made using the Paytm app. It shows you the transaction summary of the money that was paid and received through Paytm. And in addition, the Passbook page also shows the transaction summary of the time when you have added money to your Paytm account.
Main Features of Paytm Application:


Mobile Recharge and Bill Payment.


Money Transfer.


Water, Gas, and Electricity Bill Payment.


DTH Recharge.


Pay with QR Code Scanner.


Book IRCTC Train, Bus and Flight Tickets.

So, above were the steps through which one can check Paytm Wallet balance on their smartphones without any hassle. Now, the cash in your Paytm wallet can be used to pay bills at various places such as petrol pumps, departmental stores, restaurants, multiplexes, hospitals and various other places where merchants provide the Paytm money transfer services.

But if you don’t have a sufficient amount in your Paytm wallet then you can easily transfer it from your bank account to your Paytm account. For doing so, tap on “Add Money” option, then select the payment option, now enter your bank details, and tap on “Pay Now”, that’s it your money will get transferred immediately. But bear in mind if you want to transfer your Paytm wallet cash to your bank account then there are certain tax reduction in the process.Sponsor ads:

Gihosoft Free iPhone Data Recovery:https://www.gihosoft.com/iphone-data-recovery-free.html

Gihosoft iPhone Data Recovery Free

Free iPhone Data Recovery Software for Windows/Mac

Recover up to 12+ types of files, including contacts, SMS, photos, WhatsApp, Viber, notes, etc.

Restore lost data from iOS devices directly or from iTunes and iCloud backup

Recover iPhone data lost due to iOS upgrade/jailbreak, accidental deletion, device lost or broken

Support all the latest iPhone, iPad and iPod Touch

Both Free and Pro version.

If you lost data after you updated to a new iPhone, you can always use Gihosoft iPhone Data Recovery to get the data back from the old iPhone or backup.You may also like: iphonerecovery.com

If you use android phones, please choose Gihosoft Android Data Recovery.

With Gihosoft Android Data Recovery, no longer afraid of data loss!

Gihosoft RePicvid Free Photo Recovery Software provides a free photo recovery software for windows to help users recover the deleted or lost photo for free.

Jihosoft Android Data Recovery: the best Android Data Recovery software for Windows and Mac to recover deleted contacts, messages, photos, videos, WhatsApp and etc from Android devices.

jihosoft Free iPhone Data Recovery


Worth reading:Best youtube downloader online download youtube 1080p


12/09/2018

9 Best Habit Tracking Apps For Android To Achieve Goals In 2019


It’s easier to snooze an alarm clock or grab that uneaten chocolate when feeling too stressed, or even miss out on workout regimes on a lazy Sunday morning. But what’s really challenging is to get persistent in a healthy routine, to get out of that cozy bed and regularly go for a morning jog.

As much as we hate habits, we actually are creatures of habit. A 2014 study revealed that 40 percent of our daily activities are simply habits. But why is it so difficult to form a new habit?

According to the renowned Charles Duhigg’s best–selling book, The Power of Habit, habits divide into three R’s: Reminder, Routine, and Reward. Think of it this way – traffic light turns green (reminder), you drive through the intersection (routine), and you get closer to your destination (reward).

Therefore, if you want to break bad habits, you only need to remove the associated reminder with it. And place an alternative in its position, like if you smoke just after having lunch, try having lunch at a different place. The reminder should force you to act on a different routine.

Similarly, when forming new good habits, you only need to place reminders, persistently follow the task, and celebrate the reward. You can either jot down the routine on a journal or go for an Android habit tracker app which can efficiently track your new goals.

Before that, you can check these Android lists as well for using your phone like a pro:


How to Make Free Calls with the Best Calling Apps for Android


7 Best Free Online Android Emulators For Windows PCs


Top 8 Free Equalizer and Bass Booster Apps for Android 2019


10 Android Fitness Apps To Help You Shed Off Pounds
9 Best Habit Tracking Apps For Android: 2018 Edition
1. Habit Tracker

Habit Tracker

Habit Tracker, previously known as HabitBull, is an all-in-one goal tracking app for Android, which gives you the necessary push to achieve your goals. The Android app allows you to create customized goals like – Today will be a successful day when I eat apples, (at least/exactly/not more than) two times a day.

The habit tracker app features detailed reports in the form of graphs and even presents motivational quotes to refuel when you are feeling blue. If you are aiming to improve your fitness regime, you can sync your Google Fit data as well. Additionally, you can lock the habit app with a passcode if you are looking for any secret goals.

You can participate in in-app forums to interact with people who have similar goals. Although the Android app is free to install, it only allows you to create three habits without a paid subscription.
Why use Habit Tracker?


Customized goals


Motivational quotes


All-in-one tracking app

Download Habit Tracker
2. Loop Habit Tacker

Loop Tracker

As simple as something can be – Loop habit tracker is for people who can compromise on many features but cannot stand a messy interface. The habit app for Android is easy to use and looks stunning when the dark theme mode is turned on.

Loop habit app also features a sticky reminder which doesn’t swipe away from the notification panel until you turn it off within the app itself. Another brilliant feature of this best habit tracking app is that you can export all your data and view it in a Microsoft Excel sheet. You can also import your habit data from other goal settings apps like HabitBull, Rewire, and Tickamate.
Why use Loop Habit Tracker?


Simple and easy-to-use interface


Sticky reminder


Useful Widgets

Download Loop Habit Tracker
3. Coach.me

Coach.me

Coach.me for Android, as the name suggests, is a life coaching app that offers add-on feature of hiring a coach for personalized training and helps in achieving your goals. You can either opt for a habit coach or leadership coach for few extra bucks.

Moreover, adding a goal in Coach.me habit tracking app is proportional to enlisting in a community of people who share beneficial information regarding the task. Even if you don’t hire a coach, you can still follow him/her, so you remain updated with the premium content shared on their coach.me profile

The only setback with the habit app is the user interface. A little bit complicated to use and might work slow on lower-end smartphones.
Why use Coach.me?


Renowned trainers available


Help from community


Also available on Web

Download Coach.me Instant Coaching
4. HabitHub

HabitHub

HabitHub is quite similar to HabitBull; only it loads a whole lot of additional features. First and foremost, there’s a reward system in this Android habit tracker app, motivating you so that you to don’t leave your task in between. Another fantastic feature is streaks of goals based on Seinfeld’s productivity formula of “don’t break the chain.”

It also includes a “punch card” view that shows which days you’re most active for each habit, and a history chart shows your streaks over time. You can also mark your goals directly from your smartwatch.

Similar to habit tracker app Habitbull, you can only track up to five habits on a free subscription but paid users would get an additional benefit of colorful themes.

Download HabitHub Habit and Goal Tracking
Why use HabitHub?


Added reward system


Based on tried-and-tested Seinfeld’s productivity formula


Colorful Themes
5. Habitica

Habitca

One of the best habit tracking apps of 2018, Habitica turns boring habits and never-ending tasks into a role-playing game where you are awarded points and freebies.

Upon successfully achieving a goal, Habitica provides you with experience points (XP) for your character. You earn gold points for making progress in your tasks, thus unlocking weapons and portions to help you in your goal completion journey.

Although Habitica’s enchanting gaming interface compels you to achieve goals, it lacks on little habit related features which a user expect from an all-in-one habit tracker app.
Why use Habitica?


Interactive Roleplaying Game experience


Reward in the form of collectibles and resources


Lose XP (Experience points) if you don’t follow your habits

Habitica: Gamify Your Tasks
6. Fabulous

Fabulous

Unlike other habit apps, Fabulous is very colorful and vibrant habit tracker, comprising of beautiful imagery. This productivity app for Android revolves around the concept of journeys: a group of five goals unlocking one after the other. It even encourages you to celebrate your little wins over time.

The best feature of this routine app is the bunch of pre-installed routines that come along, like the 7-minute workout and meditation approaches. Fabulous habit app only disadvantage is its inflexibility. The app sometimes makes you feel very restricted, and its intuitive suggestions become annoying at on point in time.
Why use Fabulous?


Elegant user interface with vibrant colors


Pre-loaded modules of new habits


Intuitive reminders

Fabulous Motivate Me! Meditate, Relax, Sleep
7. Goalify

Goalify

Goalify is another best habit tracking app with brilliant, user-friendly interface. The streamlined design helps you focus on the goals without any additional clutter. You can pause your habits if you don’t have time to work on it at that moment. Under the paid subscription, you can form groups and chat with your friends to motivate each other. You would also get personalized reports based on your habits activity.

A significant demerit of using Goalify is that you can only have three habits under free subscription. Moreover, would have to pay every month to instill more than three habits.
Why use Goalify?


Chatting with friends


Streamlined user interface


Challenges to check your progress compared to others

Goalify My Goals, Tasks & Habits
8. Goal Tracker

Another best Habit tracking app that put good use of Jerry Seinfeld’s Productivity formula is Goal Tracker & Habit List. The app includes a massive calender that where you can put big ticks or cross against each day, exactly how Seinfieled described to end procastination.

The best part about this habit tracker app is that it encompasses all the basic habit tracking features with no in-app purchases. Its a free habit tracker app with no ads or paid options whatsoever.

Goal Tracker widget brings the massive calendar right at the home screen. Also, you can export the entire habit app data to Google Drive, Dropbox, and/or local storage. The only problem within the app is UX (User experience design), which I think is quite bland.
Why use Goal Tracker?


Based on Jerry Seinfeld’s Productivity


Entirely free (no ads, in-app purchases etc)


Calendar Widget

Goal Tracker & Habit List
9. 7 Weeks


Many studies over the years have confirmed that it takes about 7 weeks or 44 days to accustom a habit into our routine. This habit app tries to turn that theory into a reality.

7 Weeks Habit app for Android comes with this smooth and flexible interface along with many customizing options for creating a goal. Along with the option of a dark theme, habit app has more fifteen different types of themes to choose from.

A drawback of 7 Weeks is that you’ll have to buy a plus version to access the most important features of the habit app. For instance, home screen widgets, custom alarms for each habit, choosing habit for different days and more.

Although the pro version costs not more than a cup of coffee, it’s still a major drawback, given that other habit tracker apps are giving much more for free.
Why use 7 Weeks?


Easy user interface


Dark Theme and 15 other theme options

7 Weeks – Habit & Goal Tracker
Which Habit app suited you best?

Be it a notepad or habit tracking app on your Android device, following habits until the end is ridiculously difficult. Frankly, I, myself, is having a tough time following each goal.

But I have found a little trick that will help you successfully reach your habit task. Try setting up one or two goals at a time. Adding too many goals might become overwhelming after a point in time which could end up not following any habit at all.

Share your views in the comments down below and do tell us your little secret upon successfully completing a habit.
Also Read:

Fix Samsung Galaxy Not Receiving Messages

Best Screen Recorder Apps for Android

The Best Web Browser for Android

The Best Mobile Keyboard Apps for Android in 2019

The Best Ringtone Maker Apps for Android

How to Save Photos and Videos in Snapchat on Android


Jihosoft Photo Eraser

Erase unwanted objects and perfect your amazing photos!

Remove objects from photos with Photo Eraser is almost as easy as taking a shot. Now you can use this tool to erase undesirable objects from your pictures, such as tourists, watermarks, logos, texts, blemishes and other unwanted things without real photo-editing skills required at all.


Jihosoft Android Data Recovery

The most powerful and professional data recovery software for Android that can restore deleted or lost contacts, photos, videos, audios, SMS, call logs, WhatsApp chat, Viber messages from any Android devices due to accidental deletion, virus attack, formatting. It supports all popular Android smartphones and tablets like Samsung, HTC, LG, Huawei, Motorola, Nexus, etc. In the meantime, you will be guided step by step if you never used this kind of tool before.



How To Hide Apps On Android (Latest Methods) 2019


Enable privacy on the apps that you have currently installed on your Android mobile with the best ways to hide apps in it with rooted Android and non rooted Android discussed in detail below.


There are billions of users who are using Android now. And Android is the platform which implements more features than any other operating system. Now in this post, I am going to tell you How To Hide Apps on Android Devices. In Android mobile, users keep on trying lots of apps, and sometimes you need privacy in your apps too. As there are lots of apps that you don’t want to show others that you are using them. And at that time you might be not able to find any solution. But today we are here to guide you in this. As the guide we are going to discuss right here will help you to hide any of your Android apps and then you can easily unhide them according to your wish. And for that, you have to follow the complete guide discussed below to proceed.

Also Read: How to Hide Private Pictures on Any Android Phone
How to Hide Apps on Android Devices

The method is quite simple and easy, and you will not need to root your Android or to use the app that only works on the rooted Android in the first method as we are making it quite simpler. For that, a simple launcher app will be greatly helpful. And the other methods will work on rooted Android. So follow the complete steps below to proceed.

#1 Method: Hide Apps on Android Devices Using Apex Launcher

Step 1. First of all, on your Android device, you need to download and install the Android launcher that is Apex Launcher the launcher that will help you to easily hide apps on your Android mobile.


Step 2. After downloading the app, simply launch the app on your device and now the launcher will get set to your device.

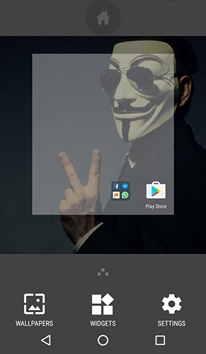
Step 3. Now on the homepage you will see the option App Settings there and you need to simply click on it.

Step 4. Now you need to navigate to Drawer Settings->Hidden apps there, just tap on it.

Using Apex Launcher

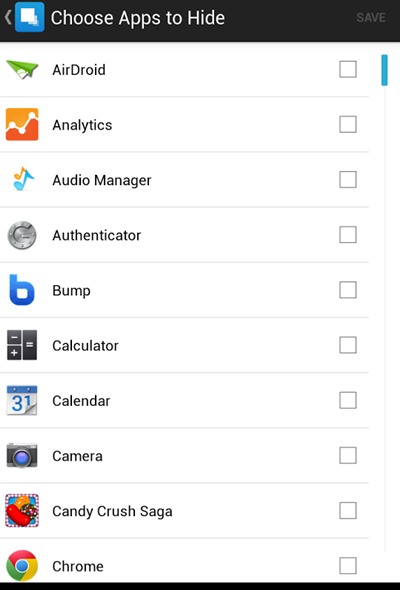
Step 5. Now you will see the list of all the apps that are currently installed on your device, and you need to select the apps that you want to hide in your Android device and then after selecting the apps, simply click on saveoption there.


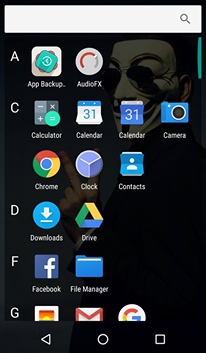
That’s it! You are done, now you can’t see those apps in your Android drawer and if you want to access those apps, you can simply access them using the Google Search of your Android device.

Also Read: How to Hide WhatsApp Chat Conversations in Android and iPhone

#2 Method: Using Hide App-Hide Application Icon App

Step 1. First of all, you need to root your Android and for that, you need to follow the guide here.


Step 2. After rooting your Android device, you need to download and install the app Hide App-Hide Application Icon and after installing the app, launch it in your device. Now simply click on + button to add the apps in order to make them hidden.


Step 3. Now you will see all the apps that are currently installed on your device, tick on the apps that you want to hide in your Android and click on save option.


That’s it! You are done, apps will get hidden, and you can easily unhide them using the same app.


Also read: How to Recover Lost/Deleted Data from Android for Free


#3 Method Using Inbuilt Feature Of Android 5.0+

In latest Android versions like the lollipop, Marshmallow, etc. there is the inbuilt feature by which you can easily hide or say protect apps. So follow the below steps to proceed.

Step 1. First of all, long tap on your Android screen and then click on Settings.

Using Inbuilt Feature

Step 2. Now there scroll down, and you will see the option Protected Apps, just tap on that option.

Using Inbuilt Feature

Step 3. Now you need to draw the pattern to hide the apps to lock them.

Using Inbuilt Feature

Step 4. Now your Android will list all the apps that are currently installed on your device, tap on the apps that you want to hide in your Android.

Using Inbuilt Feature

Step 5. Now just click on save and that’s it! you are done, now the apps will be hidden from the drawer, and you need to enable the Protected Apps option, and that will ask for the saved pattern lock.


#4 Using Parallel Space App

This is the another best way that you will surely love to try. Follow the steps below to proceed.

Step 1. First of all, in your Android, you need to download and install the app that is “Parallel Space” the app that lets you hide app in your device.


Top 8 Methods to Run Two WhatsApp Accounts on One Phone Easily


Step 2. After you successfully downloaded this app, install the app on your Android device.

Step 3. Now after the installation completes, run the Parallel Space app on your device and click on incognito installation option there.

Using Parallel Space App

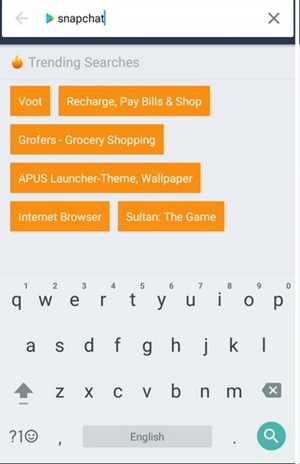
Step 4. Now you need to search for the app that you want to install and make it hidden.

Using Parallel Space App

Step 5. Now play store will open and there you will see that app, just download and install the app from there.

Using Parallel Space App

Step 6. Now click on Uninstall option on the prompt you see in the app. Now you have installed the app in parallel space and this can only be accessed in this app and will be hidden from users.


Using Go Launcher:

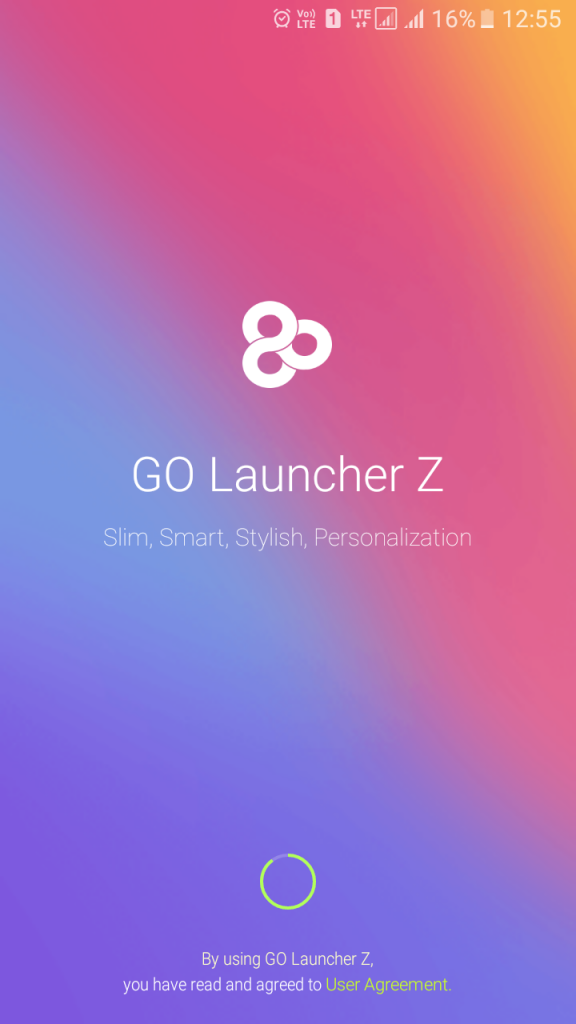
Well, this is a launcher app for your Android device. However, this app also lets users hide apps. Go launcher have a new flat interface design with interactive control experience. Let’s know how to use Go launcher to hide apps.

Step 1. First of all, you need to download and install Go Launcher on your Android smartphone.

Go Launcher

Step 2. You will see the screen like below. After that, you need to tap on “Enjoy” to continue.

Using Go Launcher

Step 3. Now open the app drawer and then long press on the app that you want to hide. Now simply drag to an app to “Hide” which is located on the top right corner of your screen.

Using Go Launcher

Step 4. Now you will be asked to set a pin or pattern lock to hide this app. Just, go through the steps. If you need to open the hidden app simply tap on the “Tools” option from your home screen.

Using Go Launcher

Step 5. Now in the next screen, you need to tap on the option “Hide App”

Using Go Launcher

Step 6. Now you need to draw your unlock pattern.

Using Go Launcher

Step 7. Now you will see your hidden app there.

Using Go Launcher

That’s it! You are done, this is how you can hide app using Go launcher.

Also Read: 10 Best Free Virus Removal Apps for Android

Best Android App Hiders

Well, there are plenty of Android privacy tools available on the Play Store that allows users to hide installed apps. Well, these apps actually hide the icon of any installed app. So, in this way, you can hide the apps. Not just that, but these apps also allow users to set up a PIN, Pattern lock to protect the hidden apps.
#1 App Lock

Android App Hiders

Well, App Lock is another best Android app hider that you can use today. The best thing about App Lock is that it can hide almost all major apps available for Android. Not just apps, but the tool can also hide photos, call logs, contacts, and browser. Apart from the hiding stuff, the tool also allows users to protect the apps with PIN or Pattern unlock. So, its one of the best App Hider for Android that you can use today.
#2 Calculator Vault

Android App Hiders latest

Calculator Vault is another unique concept to hide important apps and other files. The app allows users to hide any installed apps inside a full-fledged calculator app. That means you need to open the Calculator app to access those hidden contents. Apart from that, the Calculator Vault also provides hidden picture feature and it can also import pictures from your gallery itself. So, Calculator Vault is another best Android app hider that you can use today.
#3 App Hider

App Hider

App Hider is much similar to the Calculator Vault app that has been listed in the article. App Hider is a full-fledged app hider that turns itself into a Calculator. Yes, you can use App Hider to hide almost every installed apps. Apart from that, App Hider also provides some other features like cloning apps, photos & video vault, etc. So, App Hider is definitely the best Android app hider that you can use today.

So above discussion is all about How to Hide Apps on Android Devices. Use the complete guide discussed in the article, and you can easily have privacy in the apps that being currently installed in your Android. Hope you like this guide, do share with others too. Leave a comment below if you have any related queries with this.

Download Movies on iPhone for Free? Learn the Best Way

1. Top 5 Free Websites to Download Movies for iPhone Below we have detailed some of the best and legal websites that allow you to download m...